
Want to create eye-catching designs without any graphic design experience? This Canva tutorial for beginners will help you get started step by step. Whether you’re a student, blogger, small business owner, or content creator, Canva’s free online tool makes it easy to design posters, social media posts, YouTube thumbnails, and more.
In this guide, you’ll learn how to use Canva’s features, customize templates, and create your first design with ease. You’ll also discover useful tools like Magic Write and background remover.
Ready to design like a pro? Let’s explore Canva together—no design skills needed!
Introduction
Have you ever wanted to design something cool for your blog, social media, or school project—but didn’t know where to start? If yes, then this Canva tutorial is just for you. Whether you’re a student, blogger, small business owner, or someone who wants to create beautiful graphics without hiring a designer, Canva is the perfect tool.
Canva is a free and beginner-friendly online tool for creating posters, Instagram posts, YouTube thumbnails, presentations, and more. You don’t need any design experience to use it. You just need a little time and some creativity.
In this simple Canva tutorial, you’ll learn:
- What Canva is
- Setting up your free Canva account
- Exploring templates and using design tools
- Creating your first design with simple steps
- Pro tips to make your designs stand out
You’ll also get to know about some special tools like Canva’s background remover, resize feature, and Magic Write, which can help save time and improve your designs.
By the end of this tutorial, you’ll be ready to create stunning graphics—even if you’ve never designed anything before.
So, let’s jump in and learn Canva step by step!
What is Canva?
A Simple Tool to Design Anything
Canva is perfect for beginners who want to design clean, professional graphics online for free. Whether you want to design an Instagram post, a blog banner, a flyer, or even a school presentation, Canva has you covered.
You don’t need any design experience. Canva works in your browser and has a mobile app too. It’s perfect for students, bloggers, small business owners, and content creators.
With Canva, you can design anything—even if you’ve never used a design tool before.
What Can You Create with Canva?
Here are just a few things you can make using Canva:
- Social media posts for Instagram, Facebook, and Pinterest
- YouTube thumbnails and channel banners
- Blog headers and featured images
- Posters, flyers, and brochures
- Presentations for school or work
- Resumes, certificates, and infographics
Each project starts with a template—a ready-made design you can easily edit. You can change the text, swap images, pick new colors, and even move things around with just a drag and drop.
Free vs. Canva Pro: What’s the Difference?
Canva offers two types of accounts:
1. Free Account
- Thousands of templates
- Access to basic elements, fonts, and graphics
- Perfect for beginners and casual users
2. Canva Pro (Paid)
- Premium templates and stock photos
- Background remover (great for product photos)
- One-click resize (create multiple sizes for the same design)
- Brand Kit for custom fonts and colors
- Magic Write (AI text tool to help write captions or posts)
Most users find the free version powerful enough for everyday design needs. But Canva Pro is great if you want more features or work with a team.
Why Use Canva?
- It’s easy to learn
- No software download is needed
- Works well on mobile and desktop
- Saves time with pre-made templates
- Offers tools for both fun and professional work
Canva is more than just a tool—it’s a complete platform to help anyone design with confidence. In the next section, we’ll see how to create your free Canva account and get started in just a few minutes.
How to Get Started with Canva
Step 1: Create Your Free Canva Account
Getting started with Canva is quick and easy. Just follow these steps:
- Go to www.canva.com
- Click on the “Sign up” button
- Choose to sign up using your Google account, email, or Facebook
- Once you’re in, Canva will ask what you plan to use it for—choose an option like Personal, Student, or Small Business
That’s it! You now have a free Canva account and can start designing right away.
No credit card is needed for the free version, and you can upgrade to Canva Pro later if needed.
Step 2: Explore the Canva Dashboard
After you log in, you’ll land on Canva’s main dashboard. This is where all your design work starts. Let’s take a quick tour:
- Search Bar: Find ready-made templates for Instagram posts, YouTube thumbnails, presentations, and more
- Your Projects: Access all your saved designs
- Templates: Browse thousands of free templates
- Apps: Connect Canva with Google Drive, Dropbox, and more
- Brand Hub (Pro): Save your brand colors, logos, and fonts
Everything is neatly organized so you won’t feel lost.
Step 3: Try the Canva Mobile App
Canva also works on Android and iOS devices. You can download the Canva app from the Google Play Store or Apple App Store. The app is perfect for quick edits or posting directly to social media.
- Create designs on the go
- Upload photos from your phone
- Share instantly to Instagram, WhatsApp, or email
While the desktop version offers more workspace, the mobile app is super handy when you’re not near a computer.
Quick Tips for First-Time Users
- Use the search bar to find what you need fast
- Start with a template to save time
- Save your work regularly—Canva saves automatically, but it’s good to double-check
- Use the “Undo” button if you make a mistake
- Click “Share” or “Download” once you’re done designing
In the next section, we’ll walk through your first Canva design step-by-step, so you can create a real project with confidence.
Exploring the Canva Dashboard
Once you log in to your Canva account, you’ll see the Canva dashboard—your main control center. It’s designed to be simple and beginner-friendly. Let’s explore what you’ll find and how to use it.
Home Page Overview
The first page you see is the Home screen. This is where you can:
- Start a new design with one click
- Browse popular design types like Instagram posts, YouTube thumbnails, or presentations
- See your recently edited projects
- Access ready-made Canva templates by searching or scrolling
At the top, there’s a search bar. Type in anything like “birthday card,” “Instagram post,” or “business flyer” and Canva will show you related templates.
Tip: Templates help you design faster. You don’t need to start from scratch.
Your Projects Section
Click on “Projects” in the side menu to view all your saved designs. Canva automatically saves your work in the cloud, so you don’t lose anything.
You can also organize your designs by folders (this is helpful if you have a lot of projects).
Templates Tab
The Templates tab is a goldmine for beginners. It includes:
- Free and premium templates
- Categories like social media, video, print, and marketing
- Easy-to-edit designs
Just click on any template and start customizing it right away.
Tools and Features Panel
On the left sidebar, you’ll find tools that help you create designs:
- Elements – shapes, icons, charts, lines, and more
- Text – add headings, subheadings, and body text
- Uploads – add your own images or videos
- Photos – choose from thousands of stock photos
- Background – pick colors, gradients, or textures
- More – access apps, videos, audio, and content from other platforms
These tools appear inside your design workspace once you start editing a project.
Brand Hub (Pro Feature)
If you’re using Canva Pro, you’ll also see the Brand Hub. This allows you to:
- Save your brand logo
- Set brand fonts and colors
- Keep your designs consistent
It’s especially useful for bloggers, businesses, and content creators who want to stick to a specific style.
Share and Download Options
When your design is ready, click “Share” to email it or send a link. You can also click “Download” to save it as a PNG, JPG, PDF, or MP4 file (for videos).
Now that you’ve explored the dashboard, you’re ready to create your first Canva design. Let’s move on and make something awesome together!
Create Your First Design (Step-by-Step Guide)
Now that you’re familiar with the Canva dashboard, it’s time to create your first design! Don’t worry—it’s easier than it looks. Just follow these simple steps and you’ll have a great-looking graphic ready in minutes.
Step 1: Choose What You Want to Design
From the Canva home screen, decide what type of graphic you want to make. Some beginner-friendly options include:
- Instagram post
- YouTube thumbnail
- Blog banner
- Poster or flyer
Let’s say you want to create a simple Instagram post. Type “Instagram post” in the search bar and click the template option with the size 1080 x 1080 px.
Tip: Not sure what to include in your design? It helps to plan your ideas before jumping in. Our Ultimate Mind Mapping Guide: Improve Thinking & Focus can help you brainstorm visually and stay focused.
Step 2: Pick a Template
You’ll now see dozens of templates in different styles. Some are free, while others require Canva Pro. Look for ones that are labeled Free.
Click on a design you like. It will open in the Canva editor, where you can customize everything.
Using a template saves time and helps you start with a professional layout.
Step 3: Customize the Text
Click on the text box inside the design to edit it. You can change:
- The message (for example, “Happy Monday!” or “New Blog Live”)
- The font style
- Font size
- Text color
- Text alignment
Use the top toolbar to make these changes quickly. Canva even suggests font pairings that look good together.
Step 4: Add or Replace Images
Most templates come with sample images. You can either:
- Click on the image and hit Delete, then upload your own
- Use Canva’s Photos tab to search for free images
You can also drag and drop your photo into a frame to replace the existing one instantly.
Bonus: If you have Canva Pro, try the background remover to make your subject stand out.
Step 5: Change Colors and Elements
You can change the background color or click on shapes and icons to edit their color. Canva shows you a color palette based on your template, or you can choose custom colors.
Want to add something new? Click on the Elements tab and search for icons, arrows, lines, or stickers.
Step 6: Save or Share Your Design
Once you’re happy with the result, it’s time to export your design.
- Click “Share” if you want to send it by link or email
- Click “Download” and choose your format (PNG is great for social media)
Your design will be saved in Projects automatically, so you can edit it later anytime.
Congratulations! 🎉 You just created your first Canva design.
Prefer learning by watching?
Here’s a helpful video from Canva’s official YouTube channel that walks you through the entire design process step by step.
📺 Watch: Canva Tutorial for Beginners (2025)
In the next section, we’ll look at some useful Canva features that can make your designs even better.
Useful Canva Features Beginners Should Know
Canva comes packed with powerful tools that make designing faster, easier, and more fun. Many of these features are beginner-friendly, and some are part of Canva Pro. Let’s look at a few useful Canva features you’ll want to try.
1. Background Remover (Pro)
Have a picture but want to remove the background? The Background Remover tool makes it simple.
- Click on the image
- In the top menu, choose Edit Photo
- Then click Background Remover (available in Canva Pro)
In just one click, the background is gone! It’s great for product photos, profile pictures, and thumbnails.
2. Magic Resize (Pro)
Need the same design in different sizes—for Instagram, Facebook, or YouTube?
With Magic Resize, you can:
- Design once
- Instantly convert it to multiple sizes
- Save time and keep everything on-brand
Go to Resize in the top-left menu, choose your formats, and Canva does the rest.
3. Magic Write (Free & Pro)
Magic Write is Canva’s AI-powered writing tool. It helps you create:
- Captions
- Blog ideas
- Product descriptions
- Social media text
To use it, click Apps > Magic Write, then type a short prompt. Magic Write will generate text in seconds.
4. Smart Guides and Positioning
As you move elements, smart guides appear to help you align things perfectly. This keeps your design balanced and neat—even if you’re just starting.
Use the Position tool to align, space evenly, or center items with one click.
5. Folders and Content Planning
You can organize your designs in folders (especially helpful for bloggers or businesses). You can also:
- Schedule posts directly to social media
- Save brand colors and fonts (with Canva Pro)
6. Animations and Videos
Make your posts stand out with movement! Canva lets you:
- Animate text and images
- Create simple videos
- Add music or voiceovers
Perfect for Instagram stories, YouTube intros, or school projects.
Why These Tools Matter
These features are not just fun—they save time and help you create professional-looking designs with less effort. The more you explore Canva, the more confident you’ll become.
Next, we’ll explore how Canva works on your phone and how it compares with the desktop version.
Canva on Mobile vs. Desktop
Canva is flexible. You can use it on a desktop computer, a laptop, or your mobile phone. Each version has its own strengths, and knowing the difference can help you choose the right one for your needs.
Canva on Desktop (Web Version)
The desktop version of Canva (at canva.com) gives you the full design experience. It’s ideal when you need more space and tools for detailed projects.
Benefits of using Canva on desktop:
- Bigger screen makes editing easier
- Access to more advanced tools
- Faster performance, especially with videos and animations
- Easier to drag and drop elements
- Better for creating presentations, resumes, and business materials
If you plan to design often or work on large projects, using Canva on a computer is your best option.
Canva on Mobile App
Canva’s mobile app is available on Android and iOS. It’s great when you’re on the go and need to make a quick design or edit.
What you can do with the Canva app:
- Create and edit social media posts
- Upload photos directly from your phone
- Use templates, elements, and text tools
- Share or post designs right from the app
- Work offline (some features)
While the mobile app is easy to use, it has a smaller screen and slightly fewer features compared to the desktop version.
Which One Should You Use?
It depends on your needs:
- Use the Canva desktop version for big or complex projects
- Use the Canva mobile app for fast edits or creating content on the move
Many users like switching between both. You can start a design on your phone and finish it on your laptop—or the other way around!
Canva automatically saves your projects, so you can work from any device anytime.
Sync Between Devices
Canva keeps all your designs in the cloud. As long as you’re logged in to the same account, your projects stay synced between mobile and desktop. This makes it easy to work from anywhere.
Now that you know how Canva works across devices, let’s look at real-life ways people use Canva—from blogging to YouTube to school projects.
Real-Life Use Cases
Now that you know how to use Canva, you might be wondering—what can I actually create with it? The answer: almost anything! Canva is trusted by bloggers, YouTubers, teachers, students, small business owners, and even large companies.
Let’s explore some real-life ways people use Canva to save time, boost creativity, and create stunning visuals.
For Bloggers and Content Creators
If you write blogs, post on Pinterest, or promote products, Canva can make your content stand out.
You can design:
- Blog banners and featured images
- Pinterest pins
- Email headers
- Lead magnets (eBooks, PDFs)
- Infographics for blog posts
Example: Create a blog graphic with your post title, eye-catching colors, and a call to action using a free Canva template.
For YouTubers
Want to grow your YouTube channel? First impressions matter! Canva helps you design:
- YouTube thumbnails
- Channel art (banner)
- Video intros (with animations)
- End screens
- Social media teasers
These visuals help attract more clicks and grow your audience faster.
For Social Media Marketers
Canva is a must-have tool for Instagram, Facebook, and LinkedIn posts. You can create:
- Instagram posts, reels covers, and stories
- Facebook banners and event flyers
- LinkedIn quote graphics and carousel posts
Use Canva’s built-in content planner to schedule posts and stay organized.
For Students and Teachers
Canva makes school projects and lessons fun and engaging. Both students and teachers can create:
- Class presentations
- Group project posters
- Certificates and awards
- Worksheets and flashcards
- Event invitations (like school fests)
Many schools now recommend Canva for education because it’s free, safe, and easy to use.
For Small Business Owners
Running a small business? Canva can help you design marketing materials without hiring a designer.
Create:
- Business cards
- Product flyers
- Sale announcements
- Social media ads
- Restaurant menus
With Canva Pro, you can even upload your brand logo, use custom fonts, and create a consistent look for your business.
Summary of Use Cases
| User Type | Canva Is Used For |
| Bloggers | Blog graphics, pins, infographics |
| YouTubers | Thumbnails, channel art, end screens |
| Social Media Users | Instagram posts, reels, stories |
| Students & Teachers | Presentations, certificates, worksheets |
| Small Businesses | Flyers, business cards, menus |
Bonus Tips to Design Like a Pro
Even if you’re new to Canva, a few smart design habits can make your graphics look clean, balanced, and professional. You don’t need to be a designer—just follow these simple tips and watch your designs improve.
1. Keep It Simple
The most common mistake beginners make is trying to add too much. Don’t overload your design with too many colors, fonts, or images. Less is more.
- Stick to 1 or 2 fonts
- Use 2 to 3 colors only
- Leave some white space so your design can “breathe”
2. Choose the Right Fonts
Fonts create mood. Use a font that matches your message. For example:
- Bold fonts for headlines
- Simple sans-serif fonts for body text
- Don’t mix too many fonts in a single design
Canva suggests font pairings that work well together—use them!
3. Use a Consistent Color Palette
Choose a set of 2 or 3 colors and stick to them throughout your design. If you have brand colors (for your blog or business), save them in Canva’s Brand Kit (Pro feature).
You can also explore Canva’s color palettes for ideas.
4. Align Elements Neatly
Use Canva’s smart guides and positioning tool to line up text, icons, and shapes properly. Well-aligned elements make your design look neat and professional.
Also, use “Group” to keep items together and “Spacing” to adjust line height and letter spacing.
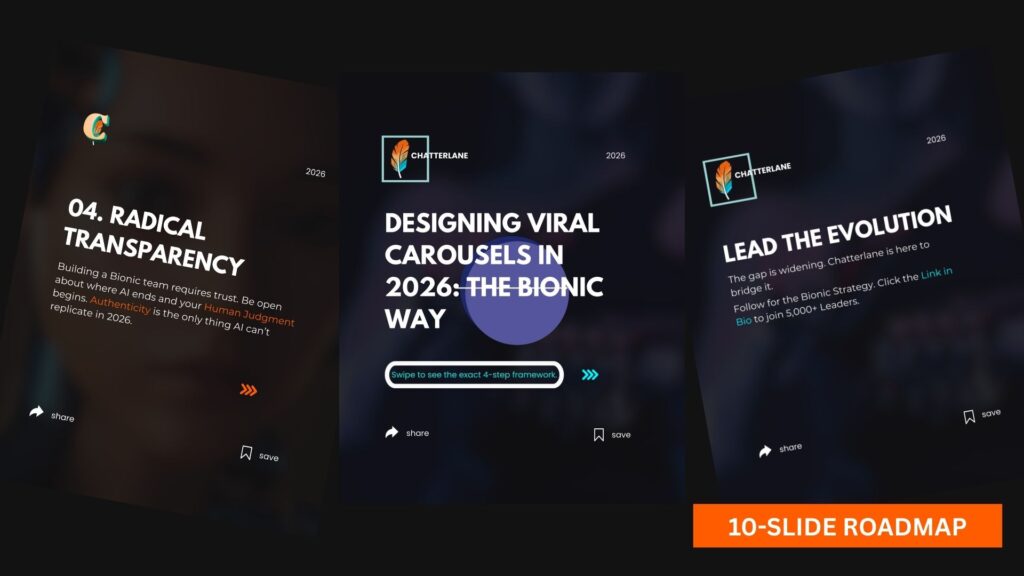
Well-aligned elements make your design look neat and professional. Learn how to master advanced alignment and 3D fanned layouts in our [Viral Carousel Design Roadmap].
5. Use High-Quality Images
Always use clear, high-resolution images. Avoid blurry or pixelated pictures. Canva’s Photos tab gives access to thousands of free and Pro-quality stock images.
You can also upload your own photos or use your brand visuals.
6. Try Canva’s Animation Tool
Want to add some motion? Use the Animate button to give life to your text and images. This is great for Instagram stories, reels, and YouTube intros.
Just click on an element, then select “Animate” and choose from effects like Fade, Pan, or Pop.
Quick Checklist for Pro-Level Designs:
- Use only 1–2 fonts
- Keep colors limited and matching
- Use smart guides to align elements
- Leave enough white space
- Check for spelling and grammar
- Download in the right format (PNG, JPG, PDF)
These simple tips can take your Canva designs from “okay” to “amazing.” You’ll start to notice better engagement on your posts, more clicks on your blog graphics, and more compliments on your visuals.
Remember: Good design isn’t about being fancy—it’s about being clear, clean, and easy to understand.
In the final section, let’s wrap up everything and give you a quick action plan to move forward with your Canva journey.
Conclusion and Call to Action
You’ve just completed a full Canva tutorial for beginners, and now you’re ready to create stunning designs—all on your own. Whether you’re making social media posts, blog graphics, or YouTube thumbnails, Canva makes design easy and fun.
Let’s quickly review what you learned:
- What Canva is and how to set up a free account
- How to explore the Canva dashboard and choose templates
- How to create your first design step by step
- Powerful tools like background remover, Magic Write, and resize
- How Canva works on desktop and mobile
- Real-life examples and pro design tips anyone can use
You don’t need to be a professional to design like one—Canva helps you do it with just a few clicks.
What to Do Next
- Sign in to your Canva account (or create one at canva.com)
- Choose a template that fits your goal
- Try creating a social media post or blog graphic today
- Save and share your design with friends or your audience
- Explore more features like Magic Write, animations, and content planner
The best way to learn Canva is by using it often. The more you explore, the better you’ll get—and soon, designing will feel natural.
Share Your Designs with Us!
Tried this Canva tutorial? We’d love to see what you created!
📩 Leave a comment, share your design, or tag us on social media. If you found this guide helpful, don’t forget to share it with someone who wants to learn Canva too.
Enjoyed this article?
If you find the blogs helpful, you can support Chatterlane with a small contribution. Even a cup of coffee helps me continue creating useful, well-researched content.
Comments
3 responses to “Canva Tutorial for Beginners: Start Designing Now”
I like what you guys are up too. Such intelligent work and reporting! Keep up the excellent works guys I’ve incorporated you guys to my blogroll. I think it will improve the value of my site :).
[…] If you’re new to Canva, check out our step-by-step guide: Canva Tutorial for Beginners: Start Designing Now […]
[…] to communicate visually. If you are a content creator or a business professional, mastering a Canva Tutorial for Beginners is no longer a luxury—it is a necessity. According to Entrepreneur, visual literacy is one of the […]